With App Connect Enterprise V12, IBM introduced a test framework to facilitate test-driven development.
In my opinion this is a great addition to the product.
When using this test functionality errors can be identified much faster in the development lifecycle.
A developer can test locally fix-packs or new product versions and the impact they will have on existing integration flows.
Tests can run isolated, on a build server or developer laptop, without requiring external services.
The test project can also be included in your existing CI/CD pipeline.
The new functionality allows you to unit test for example just one mapping node or you can test a complete integration flow.
IBM introduced 2 new topics. Node Spies and node Stubs
A spy spies on the behavior of an individual message flow node. A stub is a fake backend, database or something else that isn’t available in your local development environment.
Creating my first node spy project.
Application used.
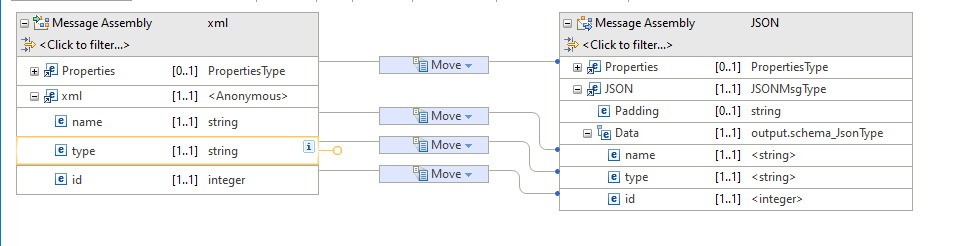
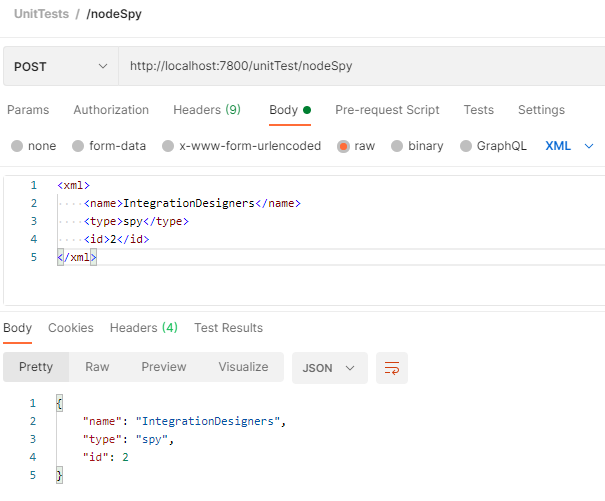
I created a simple application. The application accepts a http post request in xml and translates it to a json response which is send back to the origin.

Mapping
Once deployed to my local integration server. I can test my application.
I want to unit test my mapping node. So, I need an input and output example message. The easiest way to get this is to enable the flow exerciser and record the messages during a test call.

Save the messages before and after the mapping node.

Creating a test-project
Right-click on the mapping node–> Create Test Case
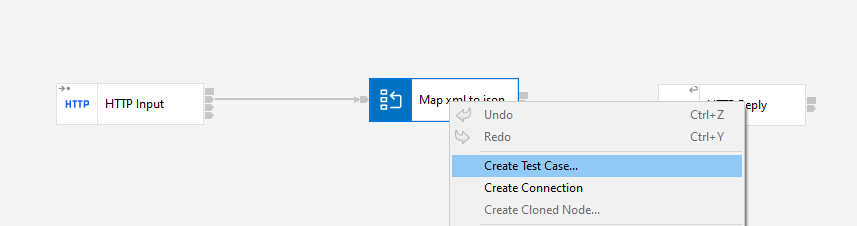
A wizard will pop up where you can set some options. The wizard will generate the sample code which can be altered afterward.
In the wizard, you can specify what you want to test. In my case here I want to test the “in” input terminal and “out” output terminal. I want to validate the message body.
By default the code for nodeSpy is generated.
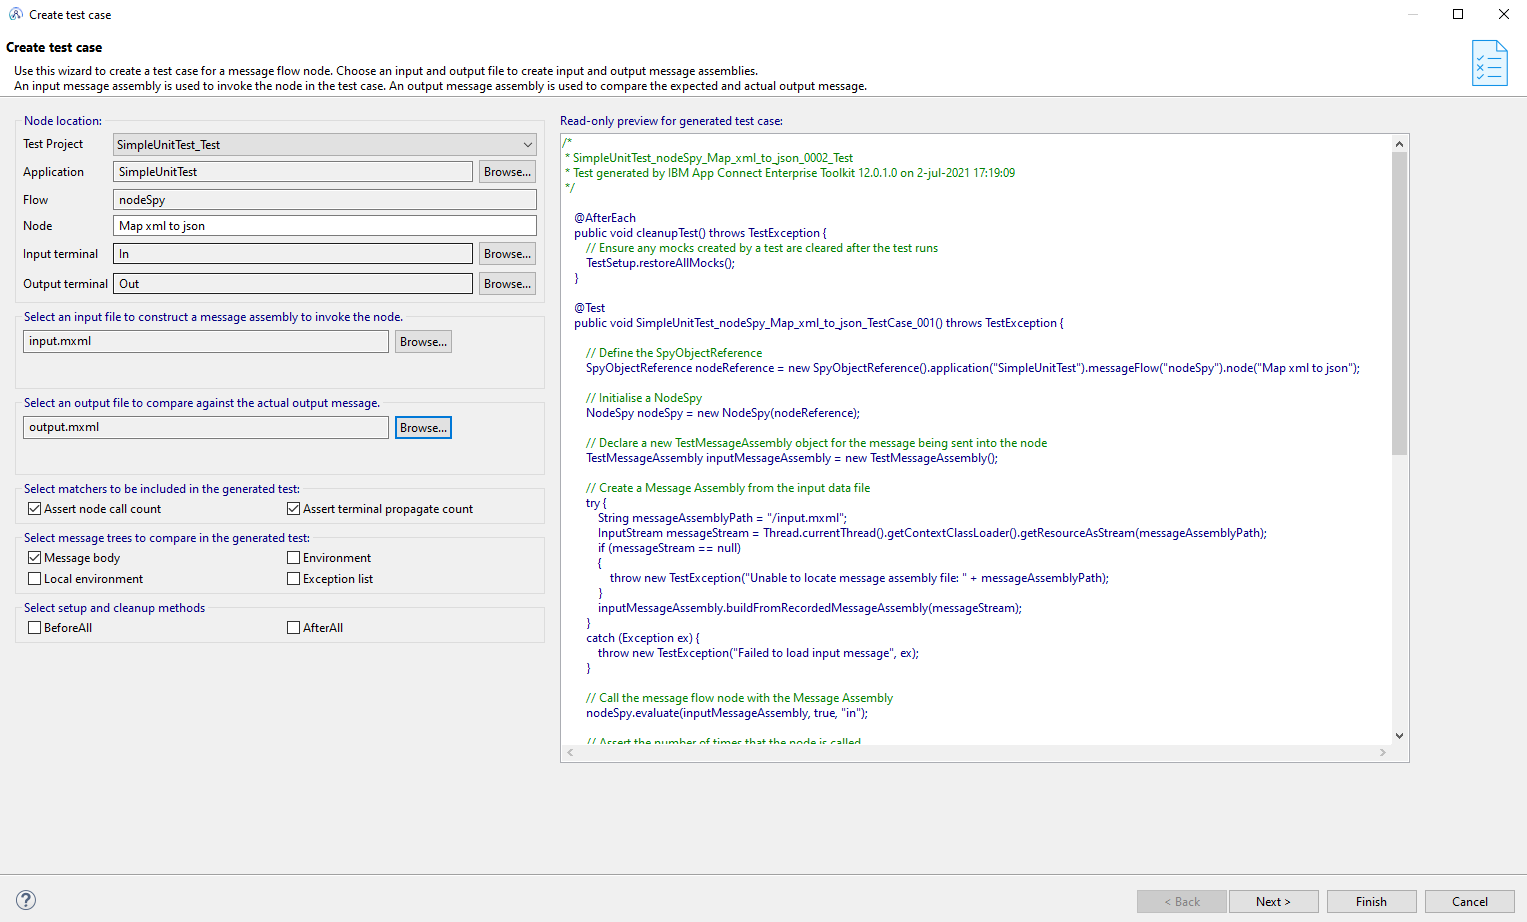
The test-project is created after clicking finish in the wizard.
To run the test-project just simply right-click on test project and select “Run Test Project”. A standard Junit result panel will open and displays the result.

During this the following actions are performed by the IDE:
- Create an integration server Junit run configuration called “eclipse-work”
- Build a bar file called SimpleUnitTest_Testproject.generated.bar that contains the Test project and any applications that are referenced by the test project. It will also include any shared libraries that the application references.
- Create a temporary integration server directory.
- Use mqisbar to set up the temporary directory with the generated bar file contents.
- Run an integration server using the test project.
- Open the standard Java Junit results panel and displays the results passed back to the toolkit from the integration server.
- Integration server terminates.
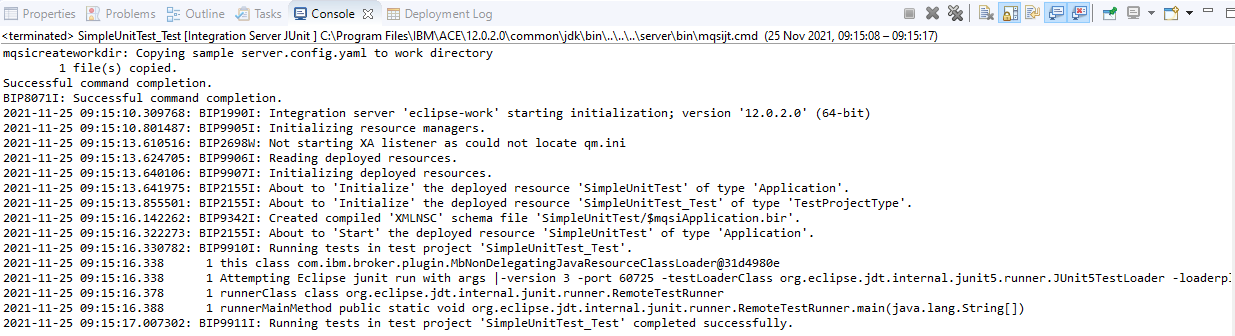
This can be viewed in the console output when executing the test.
Generating testcases
This test project example is a small and simple first project. As a developer, I don’t always want to do all these steps like record message, right click , save ,…
For this IBM provides a more automated manner to create tests. You can record your messages and generate a test project using those recorded messages.
Change in the server.conf.yaml the following section:

Restart your local integration server, in the console log you should see:
BIP9901I: Messages are now being recorded and stored at ‘C:\temp\local-server’.
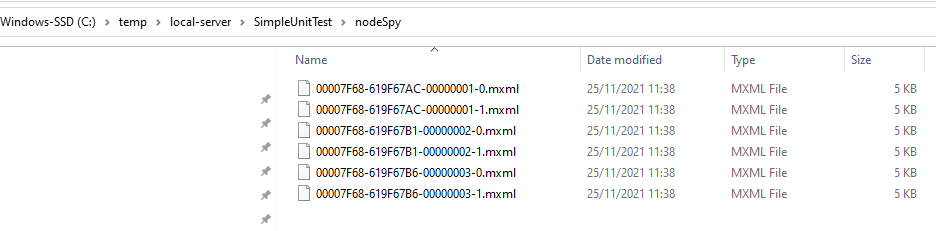
I can now send some messages through my integration flow. I’ve sent 3 messages through the flow and the record folder is now populated with some recorded messages.
You can identify the folder structure for which flows messages are recorded.
Base dir = C:\temp\local-server
Application dir = SimpleUnitTest
Msgflow dir = nodeSpy
Note: You can create an index of the recorded messages to see easily which recorded message corresponds to which node in a specific messageflow. This will help you when you want to add JUnit tests and want to reuse certain data of the recorded messages.
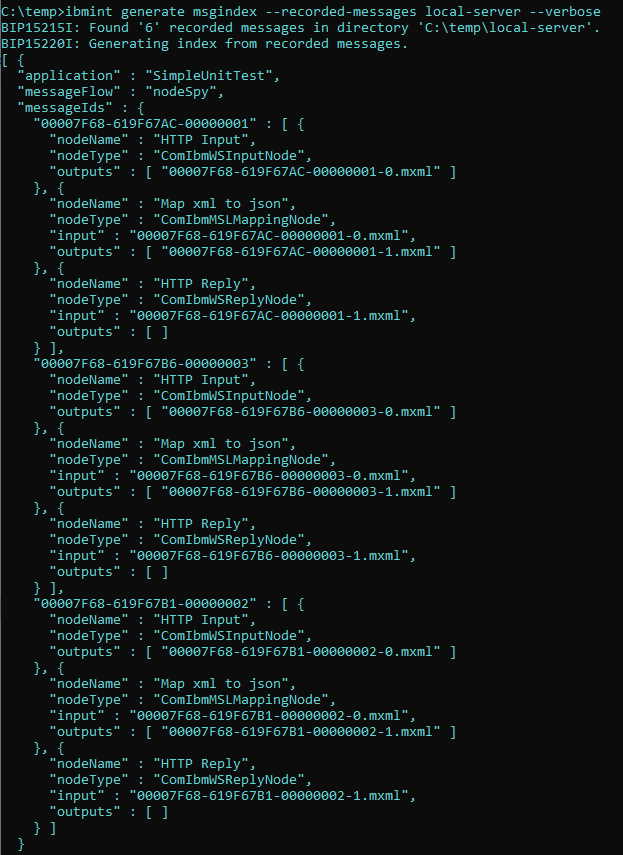
Now that we have recorded some messages. Open the console and execute the ibmint command to generate the test-cases:
ibmint generate tests –recorded-messages C:\temp\local-server –output C:\temp\Generated_TestProject –java-class com.ibm.mytests.SimpleUnitTest_Class
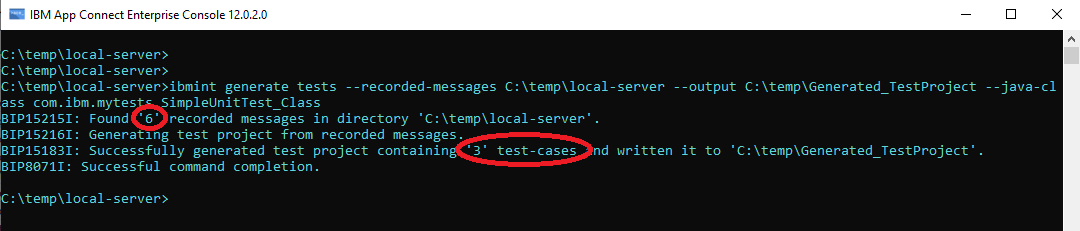
The command found 6 recorded messages and has generated 3 test-cases.

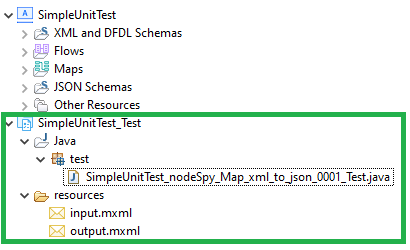
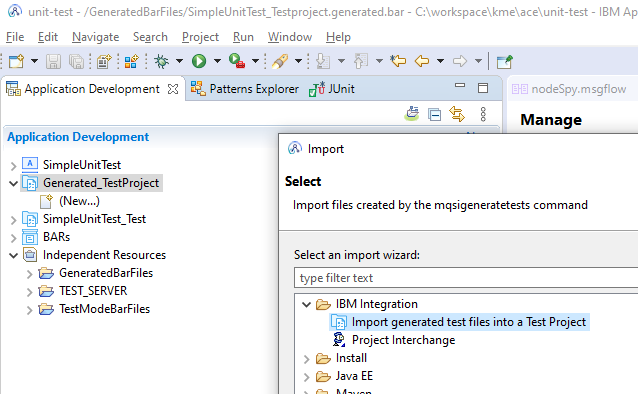
These test-cases can now be imported into your workspace. Create a new test-project and import the generated test-cases. Keep in mind that in a real-life use case probably some additional assertions need to be changed/added/removed to fit your need.
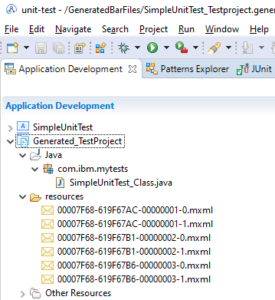
The result should look like this.
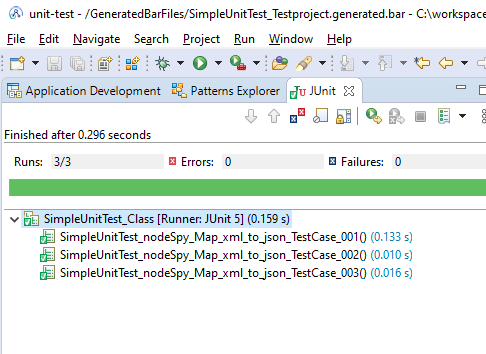
You can now run the tests in your toolkit.
Tests can also be executed from the command line without using the toolkit. First, build the test-project using the supplied build.gradle file.

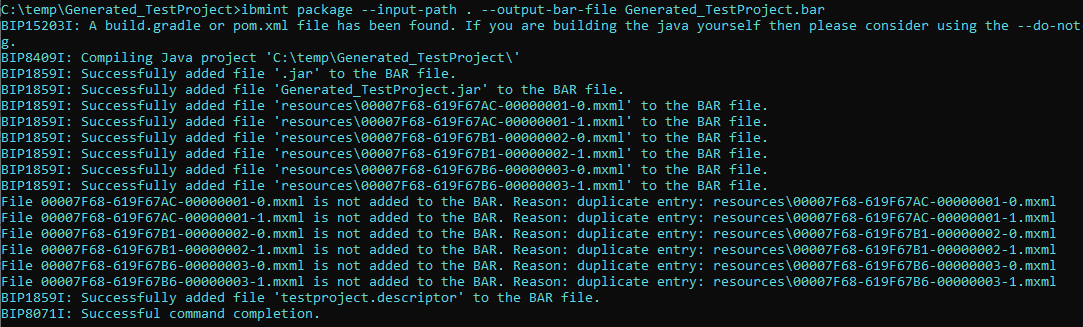
Package the test project in a bar-file.
Create a work dir to run your integration-server.

Deploy the test project bar file.
![]()
Deploy the application bar to test. When the unit test is tarted by the toolkit, the toolkit creates a bar file with the test-case and application included. This is not the case so we need to deploy the application independently.

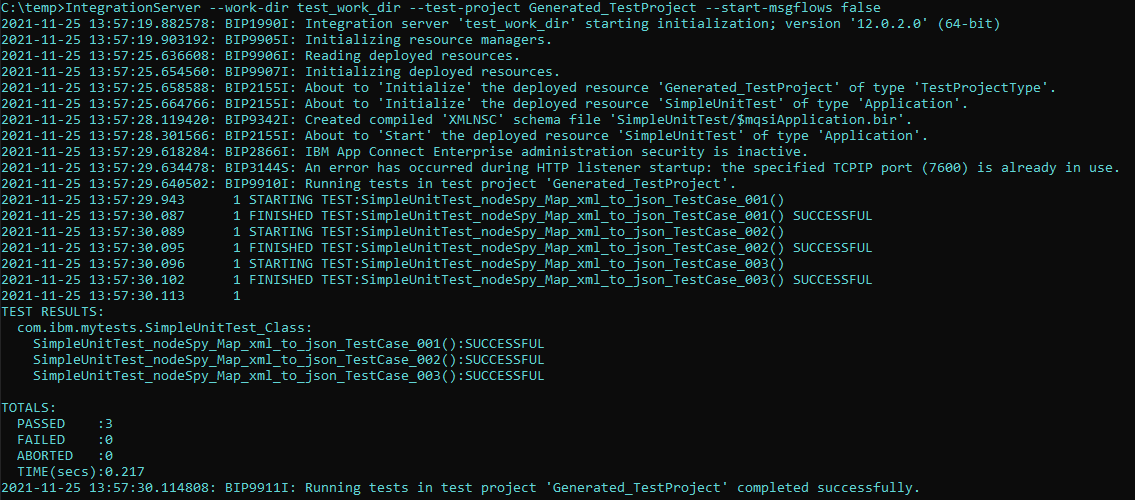
Run the test-project.
Kim Meynendonckx.
IBM Integration Specialists
Enabling Digital Transformations.
Recent news
Let's get in touch...
 Find us here
Veldkant 33B
2550 Kontich
Belgium
Pedro de Medinalaan 81
1086XP Amsterdam
The Netherlands
![]() © 2019 Integration Designers - Privacy policy - Part of Cronos Group & integr8 consulting
© 2019 Integration Designers - Privacy policy - Part of Cronos Group & integr8 consulting